Falling Snow
Weekly news
We want to hear from you! Go to the 'General' section and say what you want to say. Start a new topic if you wish.Similar topics
Who is online?
In total there are 5 users online :: 0 Registered, 0 Hidden and 5 Guests None
Most users ever online was 285 on Wed Sep 22, 2021 3:07 pm
Latest topics
Statistics
We have 490 registered usersThe newest registered user is Poisonberries
Our users have posted a total of 15531 messages in 1327 subjects
Behind the Scenes - (recoloring) How I make Sprites II
2 posters
 Behind the Scenes - (recoloring) How I make Sprites II
This is just a little thing on how to sprites as a companion thread to my fusion one. The two sprites I am using are Charizard being recolored as Suicune. You can order these and my fusions at my sprite shop  under member announcements http://nightmare.forumotions.net/t409-custom-pokemon-sprites. I also tried to put in more pictures per step and make this more comprehensible than my first guide.

In order for the picture to not have a black background when you copy-paste it onto paint, you should first paste it onto MS word. It doesn’t matter what version MS is, this is 2010.
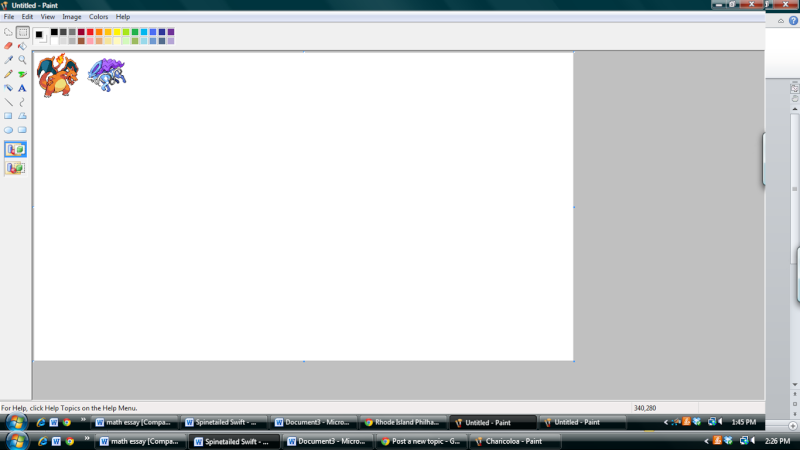
From there, you can copy-paste it onto paint with no problem.
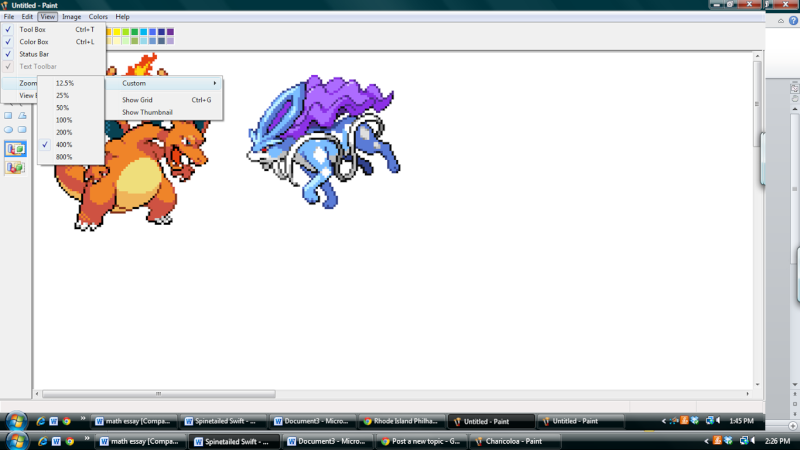
In order to make the following steps easier, you can zoom in which makes it easier to see individual pixels. I usually like to use 400, but if you don’t have a steady hand or accurate mouse, you may want to go up to 800 in later steps, depending on the size of your monitor.
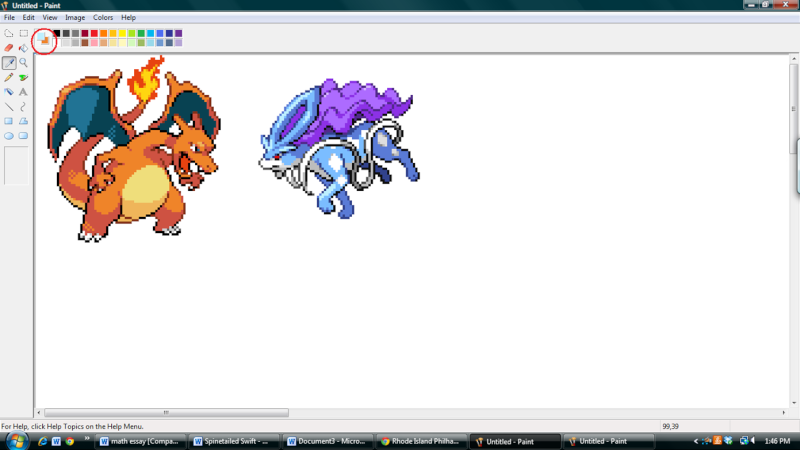
Next, what you do is take the small eyedropper tool and select the two lightest shades of the sprite that is being recolored and the sprite that is having its colors borrowed. Left click the color you are re-coloring and right click the original color. This way, when you are unsure if the original color that is being painted over is correct, you can right click and compare the shades, and then left click to set it to the new color. I like using the paint bucket, as I like the little tip that it has, but you can use whatever is fastest to use for you. The tool circled in red shows which color is set on which click.
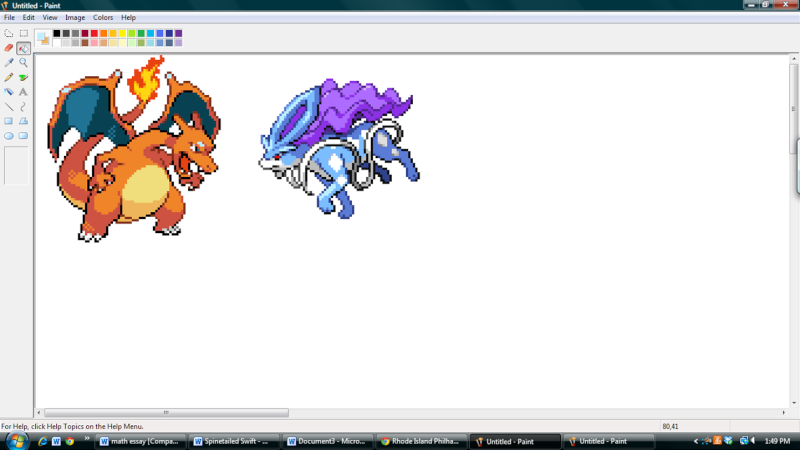
This is Charizard with the very lightest of its shades (the light orange one) changed to suicune’s lightest. I like to go from light to dark, but you can go dark to light if it is easier, but never start with the middle colors. Pokémon sprites usually have five main colors for their primary color. A very light tinge, a light one, a medium-dark, a dark that is semi-used as the outline, and black or close to black.

Charizard with the next, light shade colored in. This shade and the next usually are the two most prominent colors in a sprite.
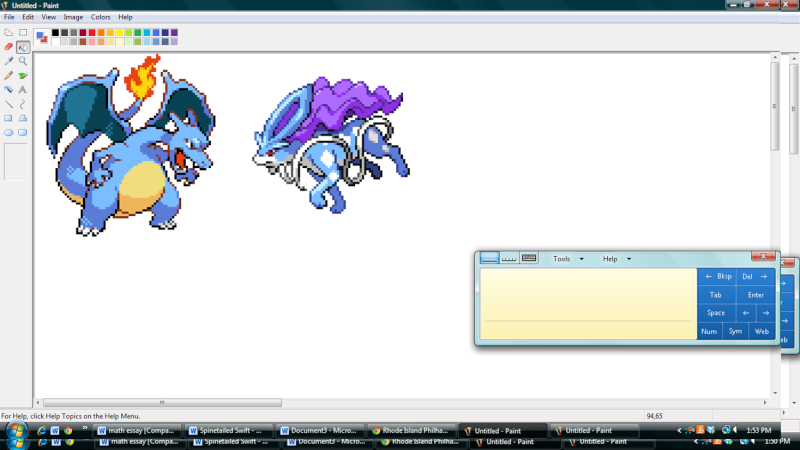
The final stage you have to shade in.
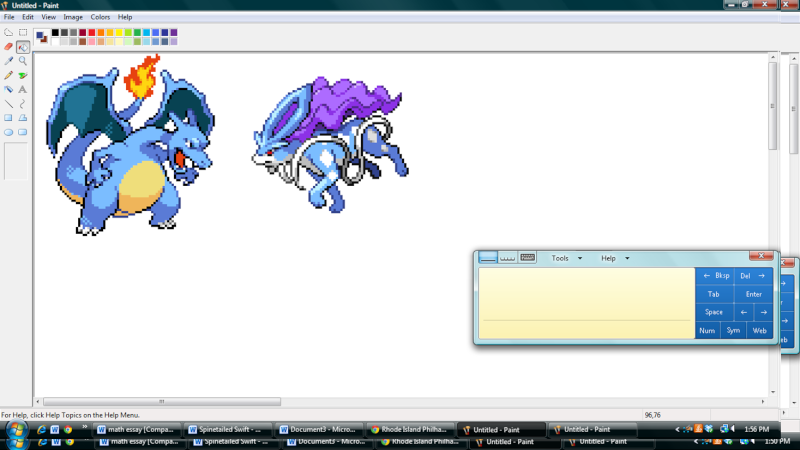
The next, third shade colored in. It looks mostly done at this point.
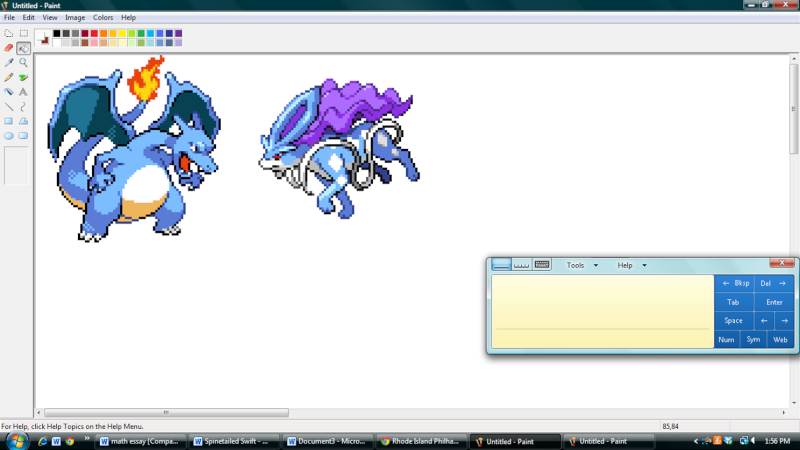
Next are the secondary colors. Here, I am taking the color from suicune’s tendril and charizard’s belly. You do not have to recolor the black outline, as that would just be silly. Note – the weird-looking box does not really have anything to do with paint. I am using a touchscreen computer and is just a random floating thing. Please ignore it.
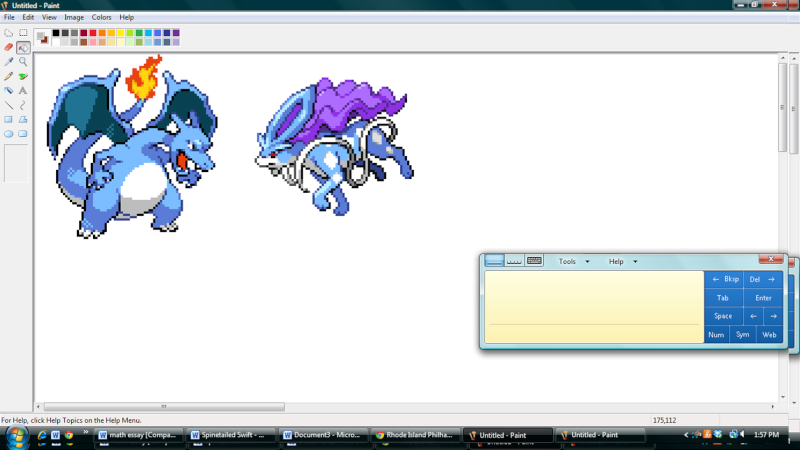
The darker shade of the secondary colors done.
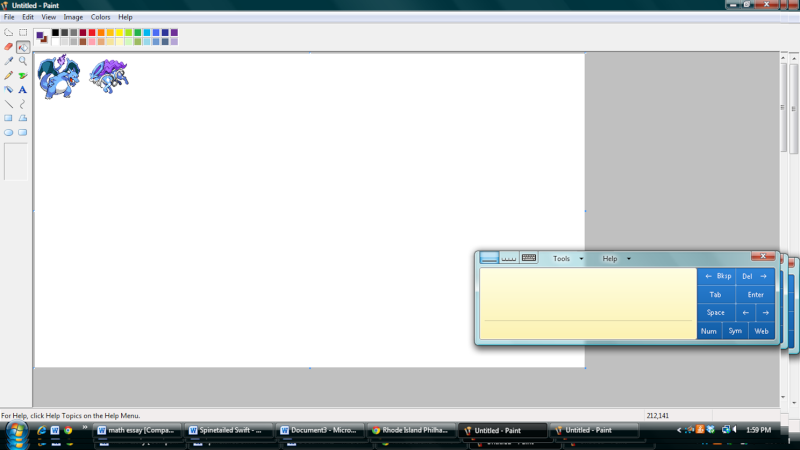
Here, I have recolored the fire and shifted it into a 100 percent view. When doing fires, always use the darkest shade of pigment, and the lightest, with one intermediate color. It makes the fire look more dramatic and more realistic, even if fires can’t possibly be purple (unless you have potassium on hand.)
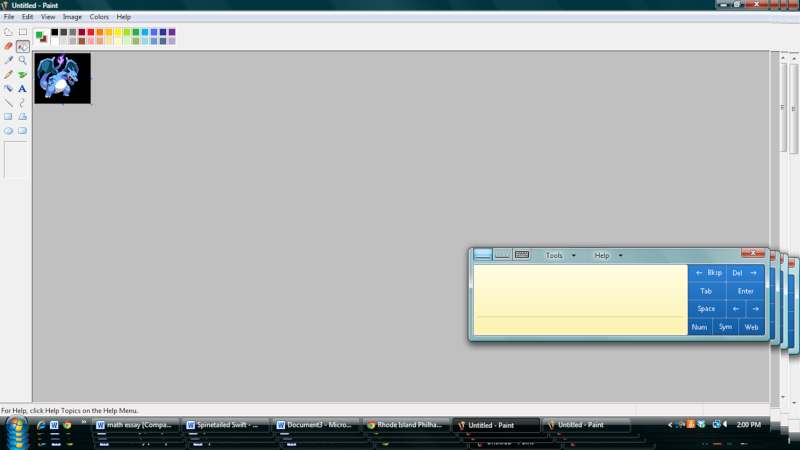
This is just a view of the finished sprite, with final touches and a changed eye color (to dark green, because I thought the natural blue blended in too much with the sprite’s new colors). I dyed the background black, because I knew this was to be posted on nightmare, but don’t if the site you are posting it on is white or green.

The finished result.
A free tutorial for sprites! (ahem rep, wink wink, nudge nudge )
Happy Spriting!
 under member announcements http://nightmare.forumotions.net/t409-custom-pokemon-sprites. I also tried to put in more pictures per step and make this more comprehensible than my first guide.
In order for the picture to not have a black background when you copy-paste it onto paint, you should first paste it onto MS word. It doesn’t matter what version MS is, this is 2010.

From there, you can copy-paste it onto paint with no problem.

In order to make the following steps easier, you can zoom in which makes it easier to see individual pixels. I usually like to use 400, but if you don’t have a steady hand or accurate mouse, you may want to go up to 800 in later steps, depending on the size of your monitor.

Next, what you do is take the small eyedropper tool and select the two lightest shades of the sprite that is being recolored and the sprite that is having its colors borrowed. Left click the color you are re-coloring and right click the original color. This way, when you are unsure if the original color that is being painted over is correct, you can right click and compare the shades, and then left click to set it to the new color. I like using the paint bucket, as I like the little tip that it has, but you can use whatever is fastest to use for you. The tool circled in red shows which color is set on which click.

This is Charizard with the very lightest of its shades (the light orange one) changed to suicune’s lightest. I like to go from light to dark, but you can go dark to light if it is easier, but never start with the middle colors. Pokémon sprites usually have five main colors for their primary color. A very light tinge, a light one, a medium-dark, a dark that is semi-used as the outline, and black or close to black.

Charizard with the next, light shade colored in. This shade and the next usually are the two most prominent colors in a sprite.

The final stage you have to shade in.

The next, third shade colored in. It looks mostly done at this point.

Next are the secondary colors. Here, I am taking the color from suicune’s tendril and charizard’s belly. You do not have to recolor the black outline, as that would just be silly. Note – the weird-looking box does not really have anything to do with paint. I am using a touchscreen computer and is just a random floating thing. Please ignore it.

The darker shade of the secondary colors done.

Here, I have recolored the fire and shifted it into a 100 percent view. When doing fires, always use the darkest shade of pigment, and the lightest, with one intermediate color. It makes the fire look more dramatic and more realistic, even if fires can’t possibly be purple (unless you have potassium on hand.)

This is just a view of the finished sprite, with final touches and a changed eye color (to dark green, because I thought the natural blue blended in too much with the sprite’s new colors). I dyed the background black, because I knew this was to be posted on nightmare, but don’t if the site you are posting it on is white or green.

The finished result.
A free tutorial for sprites! (ahem rep, wink wink, nudge nudge )
Happy Spriting!
 Re: Behind the Scenes - (recoloring) How I make Sprites II
Nice epic I should create a Banette sprite like this =3

Frashu- Admin

- Posts : 1121
Join date : 2010-09-13
Age : 27
Permissions in this forum:
You cannot reply to topics in this forum


 by Lynjabear Fri May 13, 2011 3:51 pm
![http:// [scroll][img]https://i1082.photobucket.com/albums/j375/wa](https://2img.net/i/fa/empty.gif)
» y helo, it is i, tito
» Sup, I'm Evan.
» I am the best waifu.
» add me on skype and read me complain about random desu.
» Spam Posting/Reviving Dead Threads
» What Movie Does Nightmare Want to Watch This Spring?
» You know what to do if it happens.
» STR8 IS BACK